Tomato-dressed Linguine

Tomato-dressed linguine
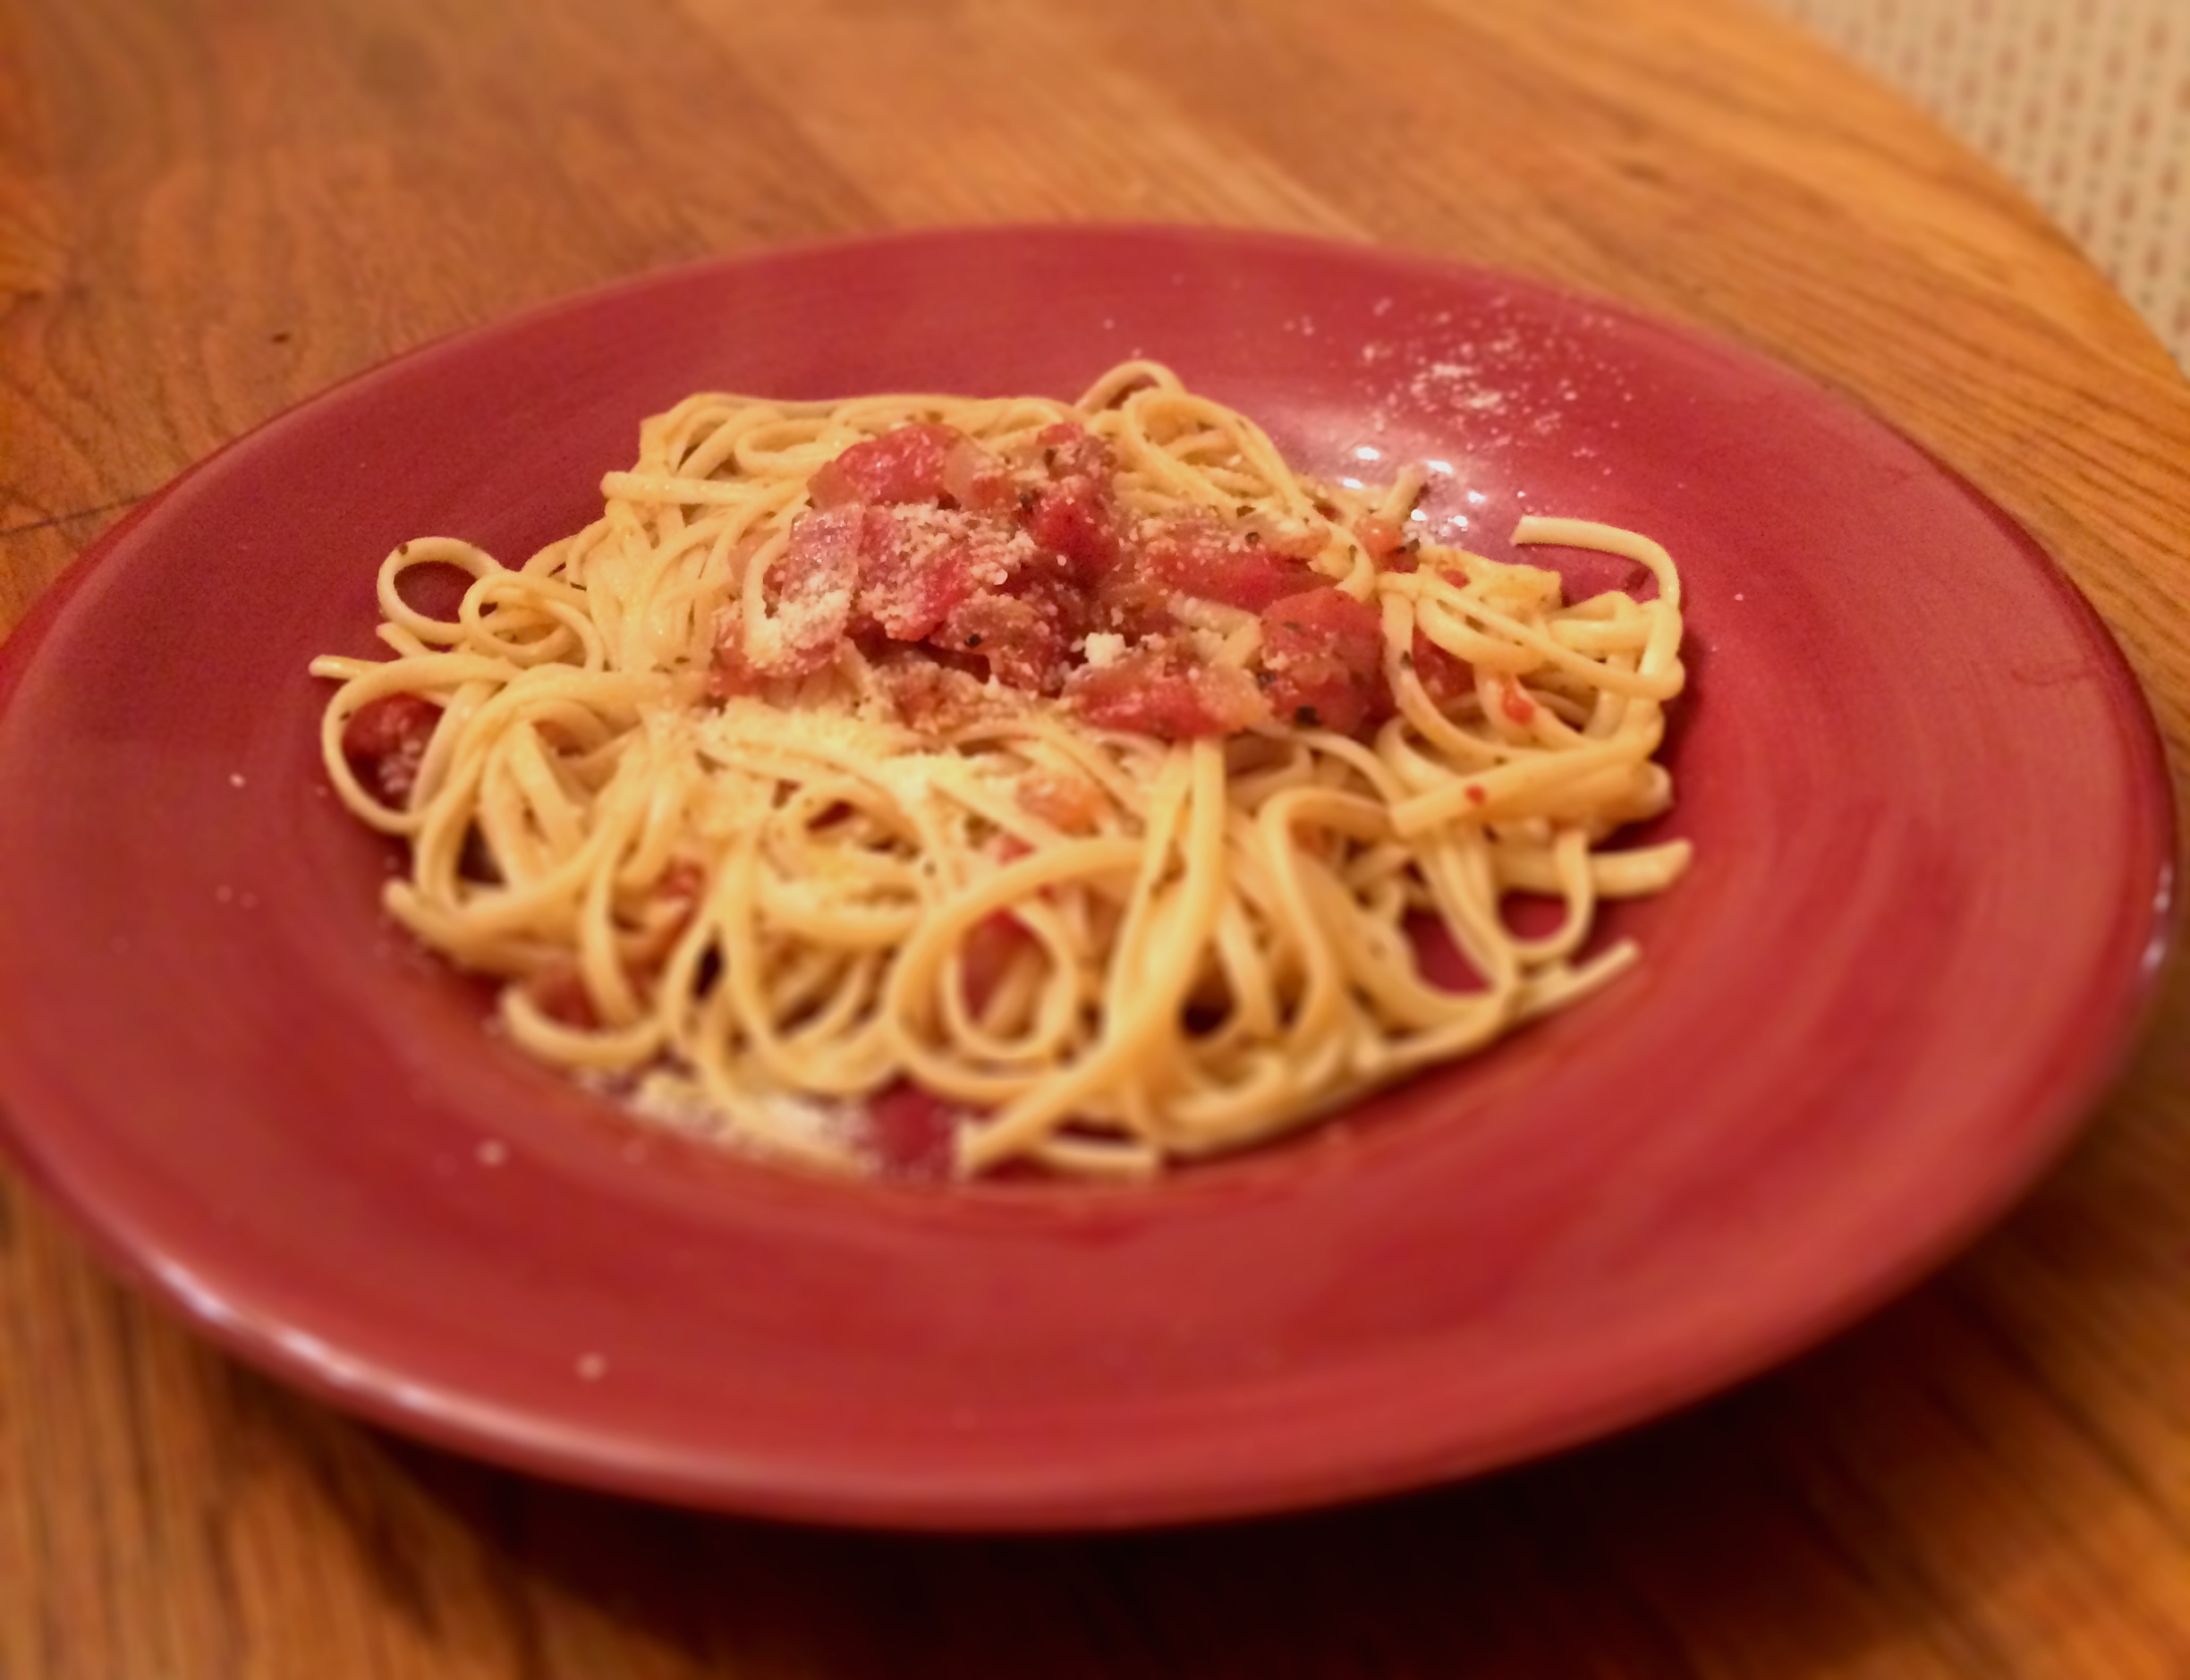
I’m not sure why, but when I need to make a quick and easy meal, pasta is what I go for. This particular dish was a “what has it got in its cupboardses” dinner (I probably should go shopping more often). The dressing – I hesitate to call it a sauce – comes together in roughly the time it takes to boil the water and cook the linguine, which means that this can be put together in 15-20 minutes. It scales very nicely too.

Prep time: 5-10 minutes
Cook time: 15-20 minutes

Ingredients

  • 8 oz linguine
  • 14oz diced tomatoes (2 Roma tomatoes, diced, if fresh)
  • 1 Tbsp minced garlic
  • 1 cup finely-chopped onion
  • 2 tsp basil (3-4 leaves chopped, if fresh)
  • 1 tsp oregano (1-2 leaves chopped, if fresh)
  • 1/2 tsp crushed red pepper
  • 1/2 tsp black pepper
  • 2 Tbsp olive oil
  • Shredded or grated Parmesan cheese, to taste

Tools

  • A pasta pot
  • A collander
  • A 12″ pan
  • A chef’s or utility knife
  • A cutting board
  • A wooden spoon or spatula
  • Tongs

Directions

  1. Put the water for the pasta on to boil.
  2. Put the oil in the pan over medium heat.
  3. When the oil is nice and warm, add the garlic and the onion. Let them sauté for about thirty seconds.
  4. Add all of the other ingredients except the linguine and cheese. Stir occasionally but briskly for 2-3 minutes.
  5. Cover the pan and reduce the heat to a low simmer. You can now let the dressing simmer on very low heat as long as the linguine needs to cook, as long as you’ve already started the linguine or are starting it pretty soon.
  6. Cook the linguine according to the directions on the package (unless you’ve made the noodles yourself; then you’re on your own).
  7. When the linguine is done cooking, drain it thoroughly and then return it to the pot. Add the dressing and then toss with the tongs.
  8. Serve immediately, sprinkled with the Parmesan if you like.

This stores pretty well for 2-3 days, too, and is just as delicious cold as hot (at least to my taste buds).

Questions or thoughts? Leave a comment!

Dry Beef Stir-Fry

If there’s one thing I miss living out in the woods, it’s that I can’t get Chinese food delivered to my house. The closest real Chinese restaurant – I’m not counting the Jesse Wong’s about ten minutes away – is about fifteen miles down the road, and it’s the only one left of four or five that were here a decade ago. (And it’s much more focused on takeout and delivery than on eating in; it has three Formica tables with plastic chairs that probably date back to the Nixon administration.)

The beauty of stir-fry, though, is that it’s quick and easy to make at home. You’ll need a wok or a skillet, a sharp knife, a cutting board, a spatula, a plate and bowl, and a stovetop – that’s it. Even the ingredients are easy to find.

As an aside, let’s talk about woks and skillets for a minute. If you have a large skillet, ten inches or more at the base, you can easily use it for stir fry, but you’re going to lose some of the effect of the wok. Personally, I love my wok, and if I can get away with using it to cook something I will. But when you’re cooking stir-fry, some woks and skillets are better than others: specifically, you want a steel or cast iron pan for cooking stir-fry. This isn’t elitism or me being in bed with the Cast Iron Wok Industry; it’s a matter of safety. Stir-frying is done at really high temperatures, and it’s possible that if you have a non-stick wok, the heat will cause the coating to come off the wok – and you don’t want Teflon in your stir-fry.

If you have a thermometer that measures high enough – a candy thermometer ought to do – turn your burner to its highest setting and measure the temperature of the air as close to the coils or flames as you can get it without touching. If that temperature is below your wok/skillet’s safe cooking temperature, you’re fine. Otherwise, consider shelving this recipe until you can put your hands on a carbon-steel or cast-iron wok or skillet. (If it helps, they can be had from Amazon – so being in a small town isn’t an obstacle! – and while they’re more pricey than a non-stick version, carbon steel and cast iron last forever if you take care of them. They do need to be seasoned, though – but that’s easily taken care of.)

Anyway – back to the cooking! This recipe serves 2-4, and is delicious over rice or noodles (although it does not, as a dry stir-fry, produce much sauce at all) – and it’s a great quick dinner, because it takes less than 30 minutes from start to finish. (Even less if you’ve done the prep work in advance!)

Prep time: 5-15 minutes
Cook time: ~10 minutes

Ingredients

  • 12oz flank steak – if you can’t find flank steak, skirt steak is okay
  • 1 medium green bell pepper
  • 1 medium red bell pepper
  • 2 carrots, peeled and beheaded
  • 2 celery stalks
  • 1 small yellow (not vidalia) onion, or 1/2 medium
  • 1 medium jalapeño pepper
  • 1 Tbsp minced ginger
  • 1 tsp minced garlic
  • 1 tsp red pepper flakes
  • 4 Tbsp peanut oil
  • 1 Tbsp soy sauce
  • 1 tsp salt
  • 1/2 tsp pepper

Tools

  • 1 flat-bottomed wok or 10″+ skillet that can withstand up to 500 degrees F
  • 1 chef’s knife
  • 1 wood or plastic cutting board
  • 1 wood or metal spatula (don’t use metal on a non-stick surface!)
  • 1 plate
  • 1 medium bowl

Directions

Preparation

  1. Julienne the carrots and celery. The matchsticks should be no more than 2″ long.
  2. Cut the bell peppers into strips.
  3. Dice the jalapeño, and wash your hands afterward.
  4. Peel the onion. If using a whole small onion, cut it in half. Cut the onion into 1/8″ strips.
  5. Cut the steak against the grain into 1/8″ strips. Then:
  6. Stack the steak strips and cut them again, still against the grain, into 1/4″ strips. You should end up with strips of steak that are as long as the original steak was wide, 1/4″ wide, and 1/8″ thick.
  7. Place the meat, salt, and pepper in the bowl and quickly toss until the meat is coated.

At this point you can put everything in sealed containers in the refrigerator – keep the meat and vegetables separate! – and store it for up to 24 hours. The vegetables will obviously last even longer.

Cooking
(I’m assuming you’re using a wok. Skillet instructions are identical.)

  1. Heat the wok over high heat until a droplet of water flicked into the wok evaporates in about one second.
  2. Add 1Tbsp of oil and the onions. Stir-fry until the onions turn translucent (1-2 minutes), then scoop them – but not any remaining oil – off onto the plate.
    • A side note: stir-frying onions is an excellent way to season a new wok.
  3. Add oil to the wok until there’s about 1Tbsp, then add the rest of the vegetables. Turn the vegetables with the spatula until they have absorbed all the oil, then scoop them off onto the plate. This should take 2-3 minutes.
  4. Add 1Tbsp of oil and the meat. Turn the meat a few times in the oil, then spread it out so it’s in a single layer around the bottom and walls of the wok. Leave the meat alone and let it sear for ~1 minute.
  5. Reduce the heat to medium. Begin turning the meat, stir-frying vigorously for another 2-3 minutes, until the meat is fully cooked.
  6. Return the vegetables to the wok, and add the garlic, ginger, soy sauce, and remaining oil. Stir-fry vigorously for another 30 seconds.
  7. Remove the wok from heat and serve the stir-fry immediately.

Questions or thoughts? Leave a comment!

Crockpot Chicken Curry

It’s no secret that I love Indian food, and when I can’t get to an Indian restaurant, I have a couple of recipes that do a halfway-decent approximation. This is an ultra-simplified recipe, but it tastes delicious and it’s really, really easy. I use some frozen ingredients here; you can use fresh or canned if you want.

Note: If you don’t like or can’t eat yogurt, you can safely leave it out. Just ignore step 3 of the cooking directions entirely and reduce cooking time to 6 hours.

This recipe serves 4-6, but it’s easily scaled up or down.

Prep time: <15 minutes Cooking time: 6-7 hours (see notes)

Ingredients

  • 4 frozen chicken thighs (preferably boneless and skinless, but it doesn’t really matter)
  • 4T curry powder
  • 2 large potatoes, cubed
  • 1 yellow onion, cut to spoon-sized pieces
  • 1 lb. frozen peas
  • 14oz canned diced tomatoes
  • 1/4c plain yogurt
  • Rice, to taste

Tools

  • One 3-4qt crockpot
  • One stirring spoon
  • One cutting board
  • One chef’s or utility knife
  • One pair of tongs, if you’re using bone-in chicken
  • One serving spoon or ladle

Directions

Notes

  • If you’re using bone-in chicken, let the crockpot do the work for you! See below.

Cooking

  1. Put the chicken, potatoes, peas, onion, tomatoes, and 3T of curry powder into the crockpot. Set the heat to low, stir the pot up a bit, put the lid on, and leave it alone for 6 hours.
  2. In 6 hours, if you’ve used bone-in chicken, use a pair of tongs to fish the bones out. The meat should fall right off!
  3. After you’ve removed the bones, or if you don’t need to, add the yogurt and the remaining 1T of curry powder. Allow to cook for another hour.
  4. Stir and serve!

Questions or thoughts? Leave a comment!

Chicken Noodle Soup

Chicken noodle soup is great for recovering from a cold and for warming up a chilly autumn or winter night. This recipe goes a lot easier if you can get boneless, skinless chicken thighs; otherwise, there’s an extra preparation step in the middle.

It’s fine to replace the vegetables with frozen soup or stew vegetables.

Ingredients

  • 2-3 chicken thighs, preferably boneless and skinless
  • 2 tsp oregano plus a pinch
  • 1 tsp sage plus a pinch
  • 1 tsp thyme plus a pinch
  • 1-2 bay leaves, to taste
  • 1/2 cup carrots, chopped
  • 1/2 cup celery, chopped
  • 1/2 cup string beans, ends removed, chopped coarsely
  • 1/2 medium onion, minced
  • 3 cloves garlic, minced or pressed
  • 6 cups chicken broth
  • 6 oz dry egg noodles

Tools

  • One 4qt crockpot
  • One stirring spoon
  • One cutting board
  • One sharp chef’s or utility knife
  • One garlic press (if pressing garlic)

Directions

Preparation

  • If you are using bone-in chicken thighs, let the crockpot do the work for you! See below.

Cooking

  1. Put the chicken thighs and half of the spices into the crockpot. Set on high and cook for 2-3 hours.
  2. If you are using bone-in chicken thighs, remove the bones after the thighs have cooked for 2-3 hours. This will make getting the bones out much easier; they may even separate on their own.
  3. Once the bones are removed (if necessary), add the broth, the vegetables, and the rest of the spices.
  4. Reduce heat to low and cook for 2-3 more hours.
  5. About half an hour before serving, add the egg noodles, along with a pinch more of each spice, and stir well.

Well, I know what I’m making this weekend!

Questions or thoughts? Leave a comment!

Spaghetti Sauce

I’ll start off with one of my favorite dishes to make (and one of my son’s favorite to eat): spaghetti. I made this last night, but forgot to take a picture, so I’ll add one the next time I brew it up.

This spaghetti sauce is based on my mother’s recipe; I’m not sure where she got it. It’s easy to make both on the stovetop or in a slow cooker; I tend toward the latter since at the moment I only have one pot and I need to devote it to the noodles. I’m doing my best to keep this low-salt and low-fat, which means that the natural flavors of the ingredients really come out.

Ingredients

  • 1 lb ground beef, as lean as you can get it
  • 1 medium onion, white or Spanish
  • 2 cloves garlic
  • 8 oz button or baby portobello mushrooms
  • Either:
    • 6 large tomatoes

    or

    • 13 oz canned diced tomatoes
    • 26 oz tomato puree
  • 1 large jalapeño pepper
  • 2 tsp cumin, either roasted seeds or pre-powdered
  • 1 Tbsp oregano
  • up to 2 Tbsp olive oil

(Plus noodles of your choice; I like thin spaghetti, but we’ve eaten this with traditional spaghetti noodles, spaghetti rigati, linguini, and rotini.)

Tools

  • One sauté pan, 12″ or larger
  • Either:
    • One medium soup pot

    or

    • One 4qt crockpot (a 3qt will work, but it’ll be tight)
  • One slotted metal spatula
  • One stirring spoon
  • One cutting board
  • One sharp knife
  • One collander
  • One set of metal tongs
  • If you’re using cumin seeds, a grinder or mortar and pestle
  • If you’re using fresh tomatoes, a food processor or blender
  • Optional: one garlic press

(Plus a pot for the noodles. If you only have one pot, you can move the sauce to a chafing dish or bowl while you make the noodles; if you can, keep it in an oven at the very lowest temperature until it’s ready to be served.)

Directions

Preparation

  • If you’re using cumin seeds, grind them using the grinder or mortar and pestle until they’re a fine powder.
  • If you’re using fresh tomatoes, dice two of them.
  • If you’re using fresh tomatoes, purée the remaining tomatoes.
  • Dice the onion.
  • Either mince or press the garlic.
  • Wash the mushrooms and cut them into 1/4″ slices. Include or discard the stems as you see fit.
  • Cut the end off the jalapeño pepper, and slice one side of it from stem to tip, leaving the seeds intact. You don’t want to cut it entirely in half; just open one side up.

Cooking
(A note: when I say “pot”, I mean whichever of the soup pot or slow cooker you’re using.)

  1. If you’re using a slow cooker, set it to low heat. If you’re using a soup pot, set it over a medium-low heat – a high simmer.
  2. Add the tomatoes (diced and puréed) to the pot.
  3. Put the sauté pan over medium heat and add the beef. While it’s browning, stir and agitate so that it breaks into small chunks.
  4. Once the meat is thoroughly browned, lift it out of the pan with the slotted spatula and transfer it to the collander, leaving as much of the grease as possible in the pan. Rinse the beef briefly under warm water; then transfer it to the pot.
  5. Remove the beef grease from the pan as well as you can and add olive oil until the mixture coats the pan.
  6. Sauté the onions and garlic together, stirring frequently so that the garlic does not stick to the bottom of the pan. When the onions are light and translucent, use the slotted spatula to transfer them to the pot, again leaving as much grease as possible in the pan.
  7. If there isn’t enough oil left in the pan to coat the bottom, add olive oil until the mixture coats the pan.
  8. Sauté as many of the mushrooms as will fit in the pan face-down without touching. Do not stir or agitate the mushrooms; leave them alone. When you see beads of moisture start to appear on the tops of the mushrooms, transfer them to the pot with the slotted spatula, add enough olive oil to coat the bottom of the pan, and repeat this step until all the mushrooms are sautéed.
  9. Add the oregano and cumin to the pot. Stir vigorously.
  10. Place the jalapeño pepper cut side down on top of the sauce.
  11. Either:
    • Close the crockpot and let it cook on low heat for 4-6 hours.

    or

    • Cover the soup pot and let it simmer for about an hour.
    • Every 5-10 minutes, carefully remove the pepper with the tongs, stir the sauce vigorously, and return the pepper to the top of the sauce.
  12. At the end of the cooking time, remove and discard the pepper.

(Cook the noodles according to the directions on the package or, if you’ve made your own, according to the recipe.)

That looks like a lot of steps, but it’s actually quite easy in practice – the key is setting everything up ahead of time. Rinsing the beef removes a huge amount of the grease that would otherwise be going into the sauce, which helps keep the sauce more unified (the grease tends to separate from the tomato purée during cooking). Placing the jalapeño on top, rather than mincing it and adding it to the mix, gives the sauce a more subtle heat and jalapeño flavor without the heat becoming overwhelming.

You can use turkey in place of the beef, but I find that the flavor is quite different and, frankly, I don’t like it as much.

Questions or thoughts? Leave a comment!

The Small Town Chef

Every cooking show, cookbook, and cooking column these days, it seems, is based around the idea that you, too, can create works of art in the kitchen… as long as you have access to their New York bodegas and international markets. This blog challenges the second half of that notion; you don’t have to fall back on aspic and Karo pour-ons just because you’re not a jet-setter and don’t live in a major city. My name is Ellie, and I believe that food can and should be amazing even if you live in the tiniest town in the whole country.